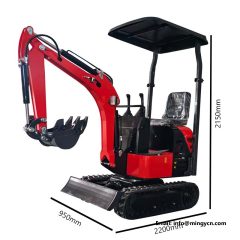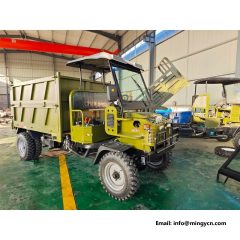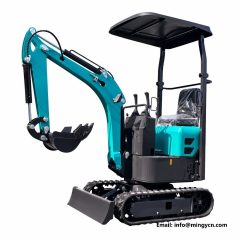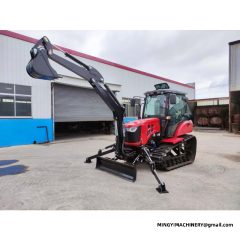
When you buy machinery from another country, the machine is built, tested, dismantled for loading, shipped for weeks, then reassembled in your yard. The only moment anyone representing you can see it working is before it leaves. That inspection is the subject of this guide: what to check, who checks it, what proof to request, and how to turn findings into corrections rather than arguments.
Why Pre-Delivery Inspection Matters More Than Warranty
A warranty is useful after the fact, but it assumes the failure is identified, documented, and accepted remotely. It rarely covers downtime, missed work, or the awkward period while responsibility is discussed. A pre-delivery inspection moves the risk to the moment when the fix is cheap, the parts are on the shelf, and the people who built the machine are still standing next to it. The shipping and documentation sequence around this step is described in the ordering and shipping guide.
What to Request Before the Inspection Date
Ask for these documents early, since several are needed to make sense of what you will see on the day:
- Final configuration sheet: engine model, pump type, flow figures, coupler type, tyre or track specification, included tools, and agreed options.
- Dimension drawing: transport length, width, height, and ground clearance in the ordered configuration.
- Serial numbers: machine, engine, pump, and major components, each to be matched on the day.
- Test record: whatever the factory records for hydraulic pressure checks and functional testing.
- Parts and tool list: the startup kit, manuals, and any tools agreed in the order.
Having these documents also makes the inspection faster, because every check becomes a comparison rather than an opinion.
The Static Inspection
Start with the machine stopped and cold. Walk it systematically, and take photographs as you go rather than relying on memory:
| Area | What to look for |
|---|---|
| Welds and structure | Consistent bead, no spatter left in place, no cracked paint at high-stress joints |
| Paint and corrosion protection | Even coverage, prepared surfaces, no bare edges inside wheel arches or under brackets |
| Hydraulic hoses | Correct routing, protection against rubbing, no hose twisted or strained at connection |
| Fasteners | Consistent torque marks, no mixed or missing hardware on lifting points |
| Fluid levels | Engine oil, hydraulic oil, coolant, and fuel at specified marks |
| Electrical | Loom secured along its whole route, connectors seated, battery secure |
| Labels and safety decals | Present in the required language, legible, including serial plates |
The Functional Test
Then start it and work through every circuit under observation. A checklist that works:
- Cold start behaviour: starts without extended cranking, settles to a stable idle, no abnormal smoke beyond normal start-up.
- Instrument cluster: oil pressure, charge warning, temperature, and gauges read as expected.
- Every boom and bucket function: runs to end of travel smoothly, holds position, no drift beyond specification.
- Auxiliary circuit: if tools are fitted, each tool runs and the coupler locks correctly.
- Slew and travel: rotate both directions, then drive forward and reverse in each range if applicable.
- Temperature run: let it reach operating temperature and watch the gauge under load, not at idle.
- Leak check: after twenty minutes of work, look again at every joint, cylinder gland, and hose end.
Ask for everything to be videoed continuously rather than clipped. A continuous recording of a twenty-minute test is far more useful than highlights, because awkward moments are exactly the ones that get edited out.
Engine, Emissions, and Compliance Documents
Depending on your market, the machine may need to satisfy emissions or safety documentation requirements before registration or insurance. Confirm early that the engine family matches what was agreed, that the emissions label is present and legible, and that any compliance certificates for your destination are included in the document set rather than requested later. Ask for copies of these documents before shipping so registration can begin while the machine is on the water.
Electrical Checks People Forget
Electrical problems are rarely found after delivery because they are not dramatic at the time. Add these to the day's list:
- Every lamp, work light, indicator, horn, and travel alarm demonstrated on video.
- Instrument cluster readings with the engine running, then again after the warm run.
- Battery condition and mounting, plus evidence that nothing is left permanently drawing current.
- Wiring loom photographs at the cab entry point and along the boom, where movement occurs.
- Any optional electrics — additional valves, coupler controls, radios — operated rather than merely present.
Inspecting a Stock Machine Versus a Built-to-Order One
Stock machines can be inspected sooner, sometimes the same week, which suits buyers working to a deadline. Built-to-order machines let you specify serial-level details and observe them being met, but add lead time to every correction. Ask the factory which category your order falls into, because the inspection plan differs: stock machines need thorough verification against the agreed options list, while built-to-order machines benefit from a mid-production progress update.
The Photo and Video Protocol
Specify the shots so nothing is left ambiguous:
- One slow walkaround at eye level, showing all four sides and corners.
- Close-ups of each serial plate, readable on screen.
- Bucket or tool operation through full travel, from a position that shows both the tool and the gauges.
- Underside at least once, especially around cylinders and the slewing area.
- Instrument panel during loaded operation, not only at idle.
- The agreed parts kit laid out and counted.
Request everything before container loading, and ask for the files rather than a link that may expire.
Who Should Do the Inspection
| Option | Suits | Trade-off |
|---|---|---|
| Factory walkaround video | Single machine, straightforward configuration | You rely on their framing of what to show |
| Buyer joins by video call | First order, complex configuration, any doubt | Needs scheduling across time zones |
| Third-party inspector | Multi-machine orders, financed or tendered deals | Additional fee, scheduled lead time |
| Buyer travels to factory | Large orders, long-term supply relationship | Travel time and arrangement |
Whatever you choose, agree the checklist in advance. An inspection is only useful when both sides have already agreed what counts as a defect.
Turning Findings Into Corrections
Findings should be written as a short punch-list: item, location, photograph reference, and requested remedy. Keep it factual and specific. "Hydraulic hose chafing against the boom bracket near the arm pivot, request re-routing and protection sleeve" produces a fix; "poor workmanship" produces a debate. Ask for photographic proof of each correction, or a repeat video if the item is functional.
Confirm explicitly that nothing on the list was merely covered up for the photograph. A repainted weld is not a repaired weld, and asking that question politely is normal practice in export orders.
The Loading Check
Inspection is not finished until the machine is secured. Request photographs of:
- How the machine is positioned and lashed inside the container or on the frame.
- Dismantled parts packed, labelled, and secured — booms, cabs, counterweights, tools.
- Protective wrapping over painted surfaces and exposed cylinders.
- The container or crate number, seal number, and a shot of the closed door.
- The packaged parts kit placed somewhere you can photograph again on arrival.
These images are what allow a freight claim to succeed if the machine arrives damaged, so ask for them in writing alongside the shipping documents.
Arrival Checks: The Second Half of the Same Job
Repeat part of the inspection at your end, in this order:
- Photograph the container or crate before opening, including the seal number.
- Photograph any damage to packaging before anything moves.
- Compare delivered serial numbers with the pre-shipment documents.
- Check the parts kit against its list before the driver leaves.
- Reassembly to specification, then repeat the start-up checklist above.
- Record first-hour behaviour: pressures, temperatures, leaks, unusual noises.
- Log any finding immediately with photographs and timestamps.
Immediate post-arrival behaviour is also the baseline for everything later. If the machine runs quietly and cool on day one, that is the reference point for the maintenance routine you now own.
Documents Worth Keeping Together
- Configuration sheet, dimension drawing, and test record.
- Inspection video files and photographs, both pre-shipment and arrival.
- Serial number list for machine, engine, and major components.
- Parts kit list with your annotated condition notes.
- Punch-list and the factory's written closure of each item.
- Bill of lading and packing list with container and seal numbers.
Copies of these go into the machine folder, not into somebody's inbox. When you ask the factory for a part two years later, this folder answers most questions before they are asked, which is the same principle that governs the documentation requests in the spare parts guide.
When the Order Includes Several Machines
Multi-machine orders add one requirement the single-machine buyer never faces: consistency. Inspect one machine of each model thoroughly, then confirm the others match it in configuration, serial numbering, and finish. Differences between machines advertised as identical usually point to an option that was quietly substituted, which is far easier to resolve before the container closes than after it opens in your yard. Ask also how the machines are packed together, because contact between units during transit is a common source of cosmetic damage.
What a Good Supplier Does Without Being Asked
Experienced export factories treat inspection as routine rather than as a challenge. Expect them to offer a walkaround video as standard, to record serial numbers for you, to share a packing list before loading, and to answer a written checklist point by point. If those things are offered before you request them, that is a useful signal about how the relationship will work after delivery. If every document has to be chased twice, plan your order timing accordingly.
After the Inspection: Confirm These in Writing
- The machine passed the agreed checklist, or each finding and its remedy.
- Correction work was completed and evidenced, with dates.
- The packed parts kit contents match the agreed list.
- Serial numbers shipped match those recorded at inspection.
- Loading method, lashing, and container details are as documented.
Written confirmation converts a successful inspection into a record, and that record is what makes everything afterwards straightforward.
Common Mistakes
- Inspecting too late. Asking for a video after loading leaves no room for corrections.
- Accepting highlights instead of continuous footage. Awkward moments are edited out.
- No agreed checklist. Findings then become matters of opinion rather than fact.
- Skipping the loading photographs. Freight claims need evidence of how it left.
- Not counting the parts kit. It is the easiest item to short and the hardest to claim later.
- Nothing recorded on arrival. Damage found a week later is damage nobody accepts.
- Inspecting on your own assumptions. Configurations differ between markets; verify rather than infer.
Inspection rewards humility: assume nothing matches what you imagine, verify everything against paper, and keep the evidence. Buyers who follow that pattern report fewer arguments and faster resolutions than buyers who rely on trust alone, which is the same principle that makes written configuration sheets valuable at the very start of an order.
Full Pre-Delivery Checklist
- Configuration sheet, dimension drawing, and serial list received and checked.
- Static walkaround photographed, including underside and label locations.
- Cold start observed on video with gauges visible.
- Every function tested to full travel, twice where practical.
- Auxiliary tools operated; coupler engagement confirmed.
- Twenty-minute warm run completed, then leak re-check performed.
- Parts kit laid out, counted, and photographed.
- Punch-list issued in writing; corrections confirmed with proof.
- Loading, lashing, and container sealing photographed.
- Documents archived, then arrival inspection scheduled before unloading finishes.
This process applies whether you are buying a single excavator or several machines together. Send your order configuration and preferred inspection approach through the contact page, and ask which checks the factory routinely performs and documents without being asked.